
Easy Log Cabin Quilt Pattern & Tutorial
Hey y'all! How about we kick off the month with a FREE pattern & tutorial on this super fun and super simple log cabin style quilt. I made this quilt for my little munchkin arriving in just a couple of weeks. I wanted something with a traditional element, but also something that would show off a variety of fabrics and give a fun pop of color! And so, this quilt was born!
DOWNLOAD THE PATTERN HERE
There's a free PDF of the full pattern on my website which you can download for free. Steps are also listed out below!


Quilt Details
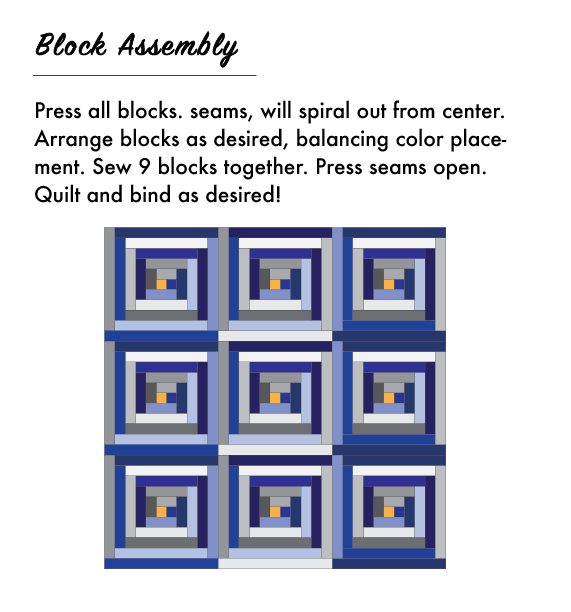
This quilt is made of nine blocks, each finishes at 16" square.
Finished quilt size: 48" x 48"
I used 9 coordinating fabrics, plus the accent fabric for this quilt for a total of 10 fabrics!
Fabric Requirements & Cutting
This quilt requires 9 fabrics for 9 blocks, plus your accent fabric. If you wanted to expand this quilt and make more blocks, simply increase the number of fabrics to coordinate with the total number of blocks you wish to make. For example, a 16 block quilt (finished 64" x 64") would require 16 fabrics + accent fabric.
Each of your main fabrics will be cut into the same number and size of strips. You'll cut 5 strips from each fabric at 2" x WOF. Each strip will be subcut according to the chart below. You'll have 21 total strip pieces from each fabric, + one 2" accent square for a total of 22 pieces in each block.


* Here's my fabric pull! This picture has 12 fabrics, but I narrowed down to 9 for my final quilt + the yellow accent!
Prep Fabric for Piecing
Label your fabrics in order 1-9. Begin making your 9 piles, each will become its own block. Starting with one of your longest strips (17") lay out 9 piles in order 1-9. Then continue to build your piles, working down from longest to shortest strips until all piles are complete. Every time you add a strip, you should shift down one color.
For example: Your first pile will have: 17" strip, color 1; 17" strip, color 2; 15.5" strip, color 3, etc...
Your second pile will have: 17" strip, color 2; 17" strip, color 3; 15.5" strip, color 4, etc...

Here's a picture of all of my strips layed out, ready to sew!

Sewing your blocks!
You can choose to sew one block at a time, or chain piece your blocks now that your piles are nicely organized. I personally like to chain piece to save time, but it does mean keeping track of the order of your blocks in between adding rows. Do what works best for you!
Begin by taking your first pile and pairing your 2" square with a 2" accent square. Sew with a 1/4" seam allowance. Rotate your block by a quarter turn so your accent square is now facing vertically and your seam is pressed down, towards your main fabric and away from your machine needle. Place your next piece (3.5") on the side and sew. Continue this process of sew, quarter turn block, add next strip!
PRESSING: I choose not to press my blocks in between adding strips, though you certainly can do so! I prefer to finger press away from my machine needle as I work and do one final press at the end. If you find your blocks are getting wonky or difficult to work with, by all means whip out that iron and get to work!

Here's some of my finished blocks!


Last Step- Assemble the quilt top!
Now that all of your blocks are complete, it's time to play with layout and decide how you want the final quilt to look. This is entirely up to your preference. Mix up the colors and rotate blocks as needed to find the right balance! Sew your blocks together, nesting seams as you work and press your final quilt top.


Quilting
I chose to quilt this on my new longarm set-up! I recently acquired an old Grace Bernina quilt frame with cradle that fits my Juki TL-2010 just right! This was the second quilt I attempted and I love how the little loopy quilting design turned out. It's a fun break from the very structured log cabin quilt block to do an organic quilting design.


Binding and the Finished Quilt!
I chose to bind this quilt with the same yellow accent fabric and I think it's the perfect finishing touch!


And that's it! I hope this quilt inspires you to try your own log-cabin style quilt with that fun pop of color! This would also be a great project for scraps or FQs that you might have laying around. Be sure to share your finished quilts and tag me!
@colorfunquilts
#easylogcabinquilt
Happy Sewing!
- Erin

Comments
Post a Comment